Converting a traditional chlorine or saltwater pool into a natural swimming pool — also called a biopool or living pool — is more achievable than most homeowners realise. By combining modern filtration technology with biological plant systems, an existing chemical pool can be re-engineered to sustain crystal-clear, chemical-free water. This guide outlines the key planning steps, equipment options, and conversion processes used in professional retrofits.
Step 1 — Planning and suitability assessment
Before beginning the conversion, assess the pool's structure, hydraulics, and environment. A sound concrete or lined shell is essential, as is good circulation infrastructure. Key assessments:
- Structural integrity — inspect for cracks, leaks or delamination that must be addressed before conversion
- Existing hydraulics — review the pump, filter and plumbing for compatibility with low-pressure continuous-flow biological systems
- Site factors — assess sun exposure, leaf load, bather frequency and available space for any regeneration zone expansion
- Water source — test source water for phosphate and mineral content, which affects filtration sizing
These factors determine which conversion approach is most appropriate and what filtration capacity the system will need.
Step 2 — Three conversion approaches
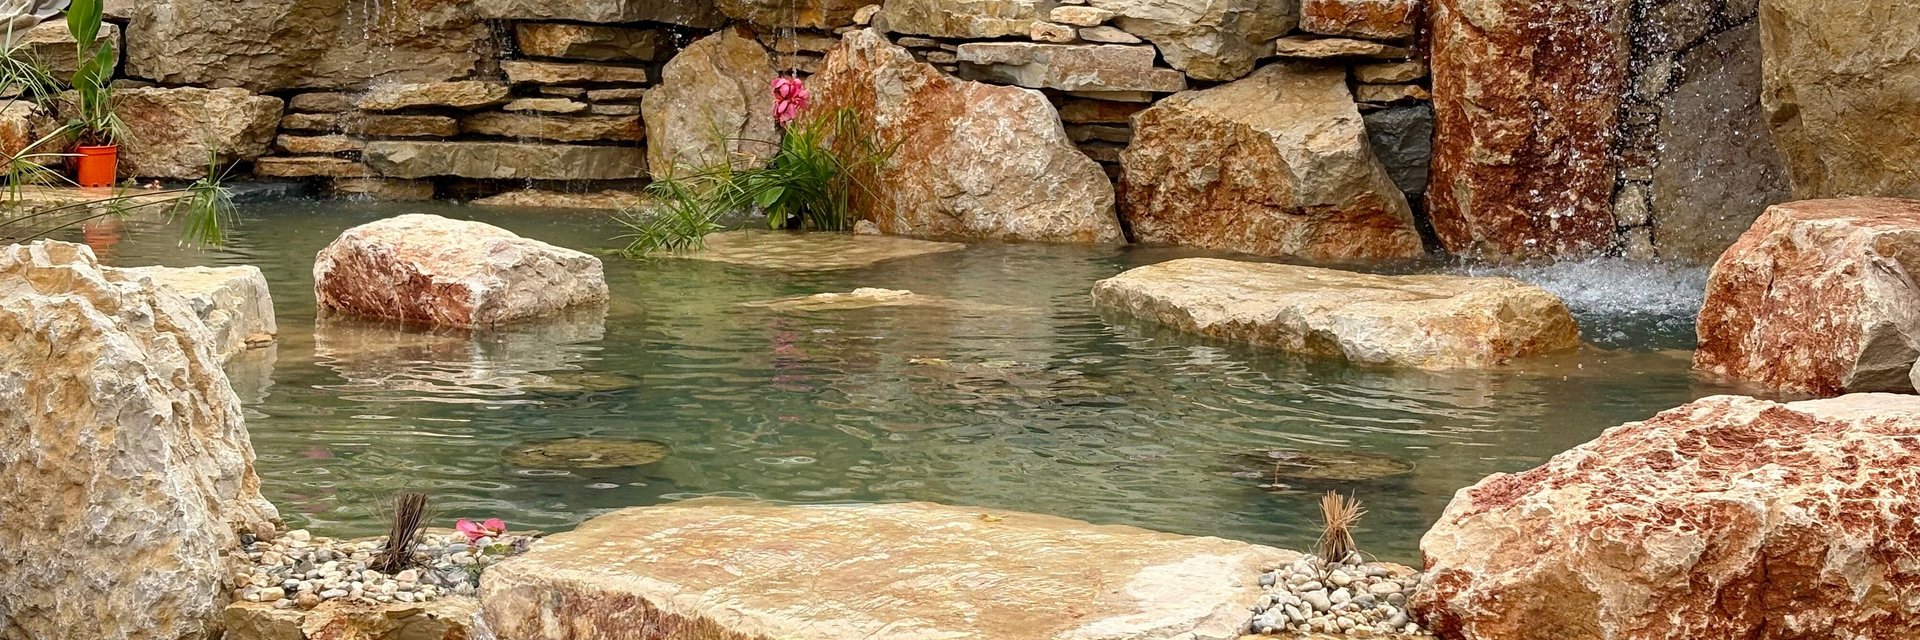
A — Regeneration Zone Conversion (Plant-Based)
This method creates a planted wetland — a regeneration zone — connected hydraulically to the main swim basin. Water flows through graded gravel and aquatic plants that biologically filter and oxygenate the system. It offers unmatched ecological balance and visual appeal. Requires adequate space — typically 30–40% of the swim basin area for the planted zone.
Best for: Sites with space for expansion, clients who want maximum naturalistic aesthetic and ecological function.
B — Converter Module Conversion (Compact System)
The existing skimmer–pump–filter circuit is retained and upgraded with a biological chamber, phosphate-removal stage and UV-C sterilisation. Chlorine generation is disabled, and the system relies on continuous low-energy biological circulation. No structural modification required.
Best for: Limited footprint, structural constraints, or clients who want chemical-free water with a conventional visual aesthetic.
C — Hybrid Conversion (Plants + Compact Bio-Filtration)
The most popular approach. A smaller planted section is installed alongside a compact bio-filter module. This blends the natural beauty and biological function of planted zones with the efficiency and footprint-savings of compact filtration. Excellent water quality with greater flexibility in design.
Best for: Clients who want plants and naturalistic elements but don't have the 30–40% area typically required for a full regeneration zone.
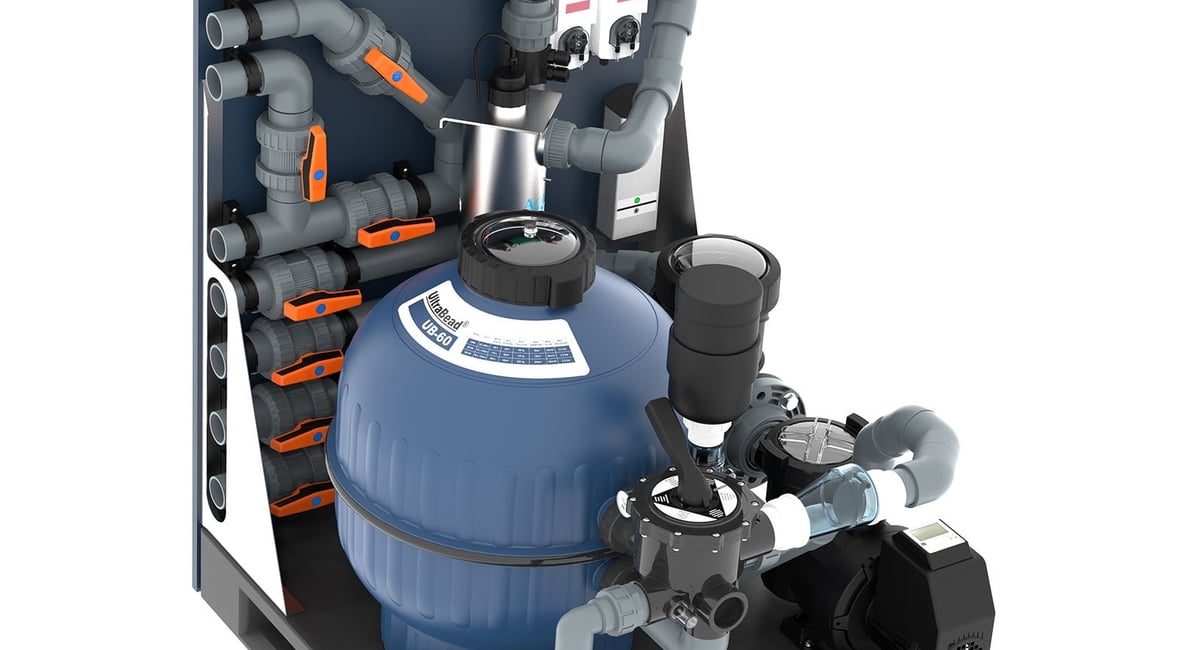
Step 3 — Equipment and circulation
Reliable, continuous circulation is vital for clarity and biological health. A natural conversion typically requires:
- Variable-speed pump — low-pressure, continuous operation at reduced energy consumption
- Bead or glass-media filter — mechanical pre-filtration to capture solids before biological processing
- UV-C steriliser — eliminates pathogens and algae spores in the circulating water
- Biological chamber or biofilm media — where beneficial bacteria colonise and perform nutrient conversion
- Phosphate filter — optional but highly effective in reducing nutrient load, particularly with mineral-rich source water
Step 4 — Media and planting
For regeneration zones, use layered stone media: 20–40mm base drainage layer, 8–16mm filter layer, and 2–8mm top layer. Avoid fine sands, which clog rapidly.
Select native or climate-tolerant aquatic species: hornwort, iris, rush, reeds, lilies or lotus depending on your climate. These plants oxygenate the water, stabilise nutrients and create a balanced ecosystem that supports long-term clarity.
Beyond filtration, even a small planted zone or perimeter planter softens concrete lines, blends the pool into its natural surroundings and transforms a sterile basin into a vibrant, living landscape feature.
Step-by-step conversion workflow
- Deactivate the chlorine system — disconnect or isolate salt cells or chlorinators; let residual chlorine dissipate over several days
- Clean and inspect — remove scaling, biofilm and debris; repair any cracks or leaks
- Reconfigure hydraulics — connect: pump → prefilter → mechanical filter → UV-C → biological or phosphate filter → returns
- Install new filtration components — whether a converter module or planted wetland, ensure even water distribution and easy maintenance access
- Add plants and fill the system — introduce aquatic plants carefully, using clean water and avoiding turbulence that uproots young roots
- Start continuous circulation — let the system run 24/7 during early stabilisation (typically 6–10 weeks); expect some natural algae bloom before biological balance establishes
Ongoing maintenance and operation
Run the pump continuously during the swimming season and reduce speed in cooler months — never let the system stagnate. Backwash mechanical filters as needed, replace UV-C lamps annually, and trim aquatic vegetation seasonally. Keep phosphate levels below 0.03 mg/L to prevent algae growth.
A well-maintained converted system stays clear year-round with minimal intervention — typically less effort than the chemical balancing routine of the original pool.
The Aqua Vitae approach: We combine compact biological and phosphate filtration modules with UV-C and bead filters, and — when space allows — a planted regeneration zone. This hybrid design ensures fast start-up, low maintenance, and the living water clarity that defines every Aqua Vitae conversion. Natural pool conversions start from €15,000.